Better Aiming, Lower Spill, Maximum Visibility
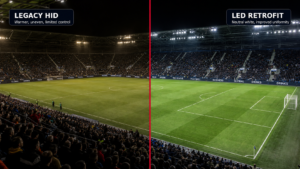
Most glare and spill problems are aiming problems. Define a max tilt policy, choose optics to support it, and verify as-built aiming with a structured aiming table and photos.
Answer: Reduce glare and spill by controlling tilt angle: define a max tilt policy, select optics accordingly, and enforce the policy using an as-built aiming table (tilt/azimuth) at handover.
Avoid over-engineering by improving geometry and aiming discipline instead of simply increasing wattage or pole counts without evidence.
- Key takeaway #1: High tilt is the fastest path to uplight, glare, and spill complaints.
- Key takeaway #2: Optics help, but geometry and aiming policy do most of the work.
- Key takeaway #3: Aiming tables + photos make commissioning auditable and repeatable.
Table of contents
1) When this applies
2) Key requirements / metrics
3) Step-by-step workflow
4) Common mistakes
5) Checklist / Template download
6) FAQ
Related reads:
• RGBW: who needs it
• Glare Control in Football Stadium Lighting
• LED Stadium Lighting Pole Height Explained
When this applies
Use this guide when you have neighbor-sensitive boundaries, strict glare requirements, or when commissioning disputes occur because aiming was not controlled.
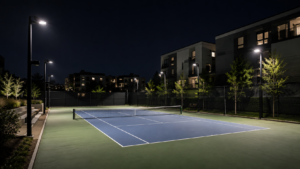
- Urban sites: road and residential glare/spill.
- Retrofits: existing geometry often forces high tilt unless managed.
- Broadcast venues: glare control impacts camera quality.
- High mast: large aiming angles amplify spill risk.
Key requirements / metrics
These metrics make aiming discipline measurable and enforceable.
| Metric | What it affects | Why it matters | How to verify |
|---|---|---|---|
| Max tilt policy | Uplight/glare/spill risk. | Defines “allowed aiming”. | Policy + as-built aiming table. |
| Optic choice | Beam control. | Tighter beams reduce off-site light. | Optics selection notes + IES/LDT mapping. |
| Aiming table | Commissioning discipline. | Without it, aiming becomes subjective. | Signed aiming table + photos. |
| Deviation log | Traceability. | Explains on-site changes. | Deviation log and approvals. |
| Re-check triggers | Long-term stability. | Storms and maintenance change angles. | Policy triggers and inspection routine. |
Definitions
CCT Tilt angle is the elevation aiming angle of a luminaire relative to horizontal. Higher tilt typically increases uplight, glare, and spill, and may reduce mechanical stability margins.
Typical target ranges
There is no single global tilt limit. The project target is: define a policy that fits your constraints and verify it.
- Set tighter tilt limits for neighbor-facing and road-facing luminaires.
- Use optics/shields and layout flexibility to keep tilt within policy.
- Verify with as-built aiming tables and photos.
Step-by-step workflow
Workflow: set tilt limits → select optics/shields → produce aiming table → commission and record → sign off with evidence.
Inputs to collect
- Boundary constraints (roads/residential).
- Pole geometry and mounting heights.
- Optic options and IES/LDT files.
Design decisions
- Define max tilt policy and exceptions.
- Assign tighter optics/shields where needed.
- Define aiming record format and photo requirements.
Verification & sign-off
- Signed aiming table (tilt/azimuth) + photo evidence.
- Deviation log for any changes.
Common mistakes
- No defined max tilt policy.
- Commissioning aims “by eye” without records.
- Using wide optics with high tilt near boundaries.
- No re-check plan after storms/maintenance.
Checklist / Template download
These downloads are generated in-browser (TXT/CSV) and can be replaced later with gated assets.
Max Tilt Policy Sheet (TXT)
Define max tilt angles per zone/scene.
Download
Request full pack
Aiming Table Template (CSV)
Record tilt/azimuth per luminaire for sign-off.
Download
Request full pack
Glare/Spill Risk Checklist (CSV)
Identify where tilt and aiming create risk.
Download
Request full pack
Tender Clause (TXT)
Tender-ready max tilt and aiming verification language.
Download
Request full pack
Request the full pack
On your website, connect this form to your CRM / email automation. This is a preview layout for your team.
Privacy: we use your details only for document delivery and technical follow-up about this request.
FAQ
Why is max tilt angle so important?
Because high tilt increases glare, uplight, and spill. It also reduces aiming stability margins.
Can optics compensate for high tilt?
Partially, but optics cannot fully fix poor geometry. The better solution is layout/height/aiming strategy that keeps tilt lower.
What is a practical max tilt policy?
It depends on the project and constraints. The key is to define a policy and verify it with an as-built aiming table.
How do I reduce glare without over-specifying wattage?
Use tighter optics, better aiming (lower tilt), and more aiming flexibility (layout/height) rather than brute-force power.
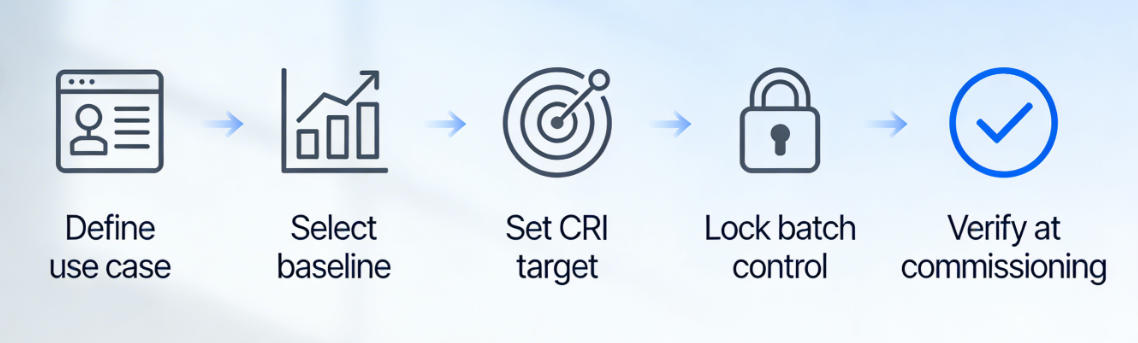
What should be included in a CCT/CRI decision pack?
Use-case rationale, baseline CCT, CRI target, consistency control plan, and acceptance notes.
What should be in the commissioning record?
Aiming table (tilt/azimuth), photos, and any deviations with reasons.
Get the PackBack to ZCLED.com