Introduction
Glare is one of the most common concerns in outdoor sports lighting. It can affect player reaction, spectator comfort, television images, nearby residents and the approval process for community facilities.
The difficult part is that glare cannot be solved by simply reducing luminaire output. If output is reduced without changing optics, geometry and aiming, the field may become darker or less uniform while the most uncomfortable viewing directions remain unresolved.
A successful project therefore treats glare control and uniformity as one coordinated design problem. The objective is to place the required light on the playing surface and relevant vertical planes while reducing unnecessary brightness toward observers, roads and residential boundaries.
1. Glare Is an Observer-Based Outcome
A luminaire is not “low glare” in isolation. The apparent glare depends on where the observer is located, the source luminance visible in that direction, the angle between the observer and the luminaire, and the background brightness around the field.
For a sports project, the critical observers may include players looking upward for a ball, goalkeepers facing the opposite end, spectators near the touchline, camera positions, drivers on nearby roads and residents outside the facility boundary.
This is why a single product claim or one generic UGR value should not be treated as universal evidence of outdoor sports-lighting performance. The project must identify the observer positions that matter and evaluate the luminaire from those directions.
2. More Light Does Not Automatically Mean Better Light
A field can be bright and still uncomfortable. Excessive source brightness, poor aiming or uncontrolled high-angle intensity can create disability glare, discomfort glare, camera flare and residential complaints.
Good glare control does not mean making the field dim. It means controlling where the light goes, how bright the luminaire appears and how different beam contributions overlap on the playing surface.
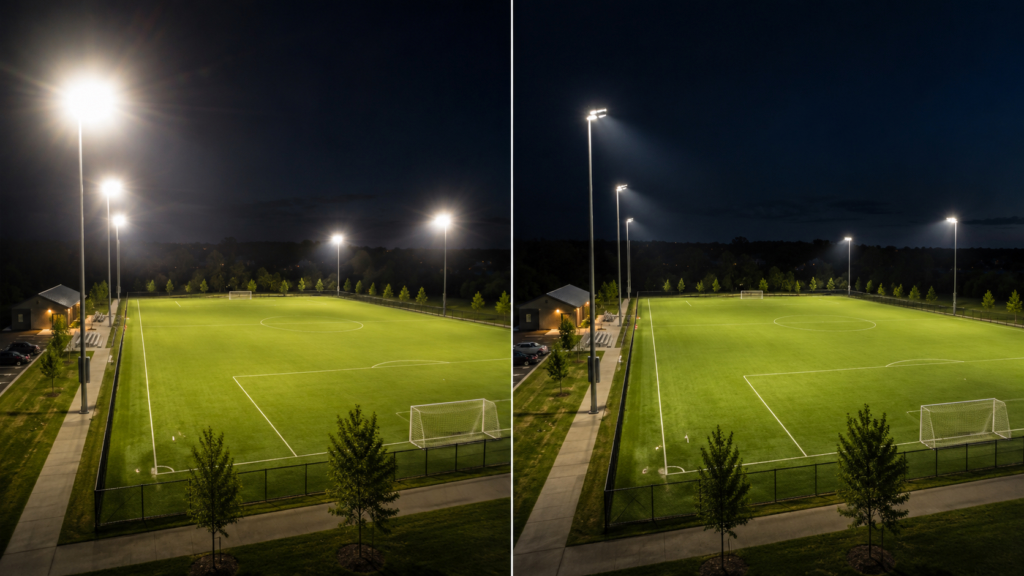
Conceptual comparison: glare control is not achieved by simply increasing brightness. The goal is to balance visibility, source luminance, aiming and field uniformity.
3. Uniformity and Glare Are Linked – but They Are Not Opposites
Uniformity is created through overlapping beam distributions. Removing too much output from one aiming group can create dark zones, while adding output everywhere can increase glare and spill light.
The correct approach is to preserve the near-, mid- and far-zone contribution of the lighting system. A visor or shield should not be accepted only because it blocks visible light; the revised photometric result must still meet the required field and vertical targets.
Good glare control usually comes from redistributing intensity, not simply eliminating it. Useful light is kept inside the required target areas while high-angle and rearward intensity are controlled.
4. Start with Pole Geometry
Pole height, setback, spacing and the distance to the far target zones determine the required aiming angles. A low pole close to the sideline may force steeper aiming and expose more brightness to players or spectators.
A taller pole or longer setback may allow shallower aiming and better long-throw geometry. However, it can also increase structural cost, effective projected area, foundation requirements and maintenance height.
There is no universal best pole height. The project team should evaluate geometry, structure, maintenance, environmental boundaries and lighting performance together.
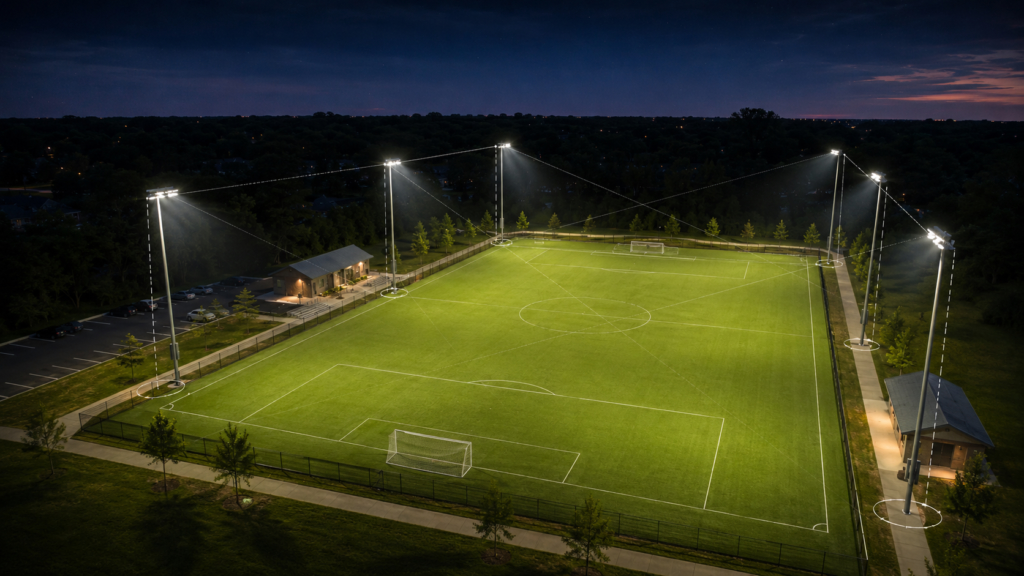
A six-pole layout should be evaluated by coverage, aiming direction and near-, mid- and far-zone contribution. This image is a simplified concept overlay, not a measured photometric simulation.
5. Use Optics and Shielding as Part of the Design
Precision optics help place intensity on the intended playing zones. Different optical distributions may be required for near, middle and far coverage, particularly in six-pole or retrofit layouts.
Visors and shields can reduce backlight, rear spill and selected high-angle intensity. They are most effective when the luminaire has already been positioned and aimed correctly.
After any shielding change, the photometric calculation should be rerun. Mechanical compatibility, wind exposure, drainage and maintenance access must also be checked.
6. Boundary Control, Spill Light and Nearby Residential Areas
For community and municipal fields, glare control must extend beyond the playing surface. The project should separate the field boundary, facility fence, project property line and residential boundary.
The main beam should be directed into the field, while rear spill and backlight toward sensitive boundaries should be controlled through optics, aiming, shields and the operating schedule.
Boundary points should be observed or measured after installation. A design that meets field average illuminance may still require adjustment if a nearby road, house or pedestrian path receives direct high-angle brightness.
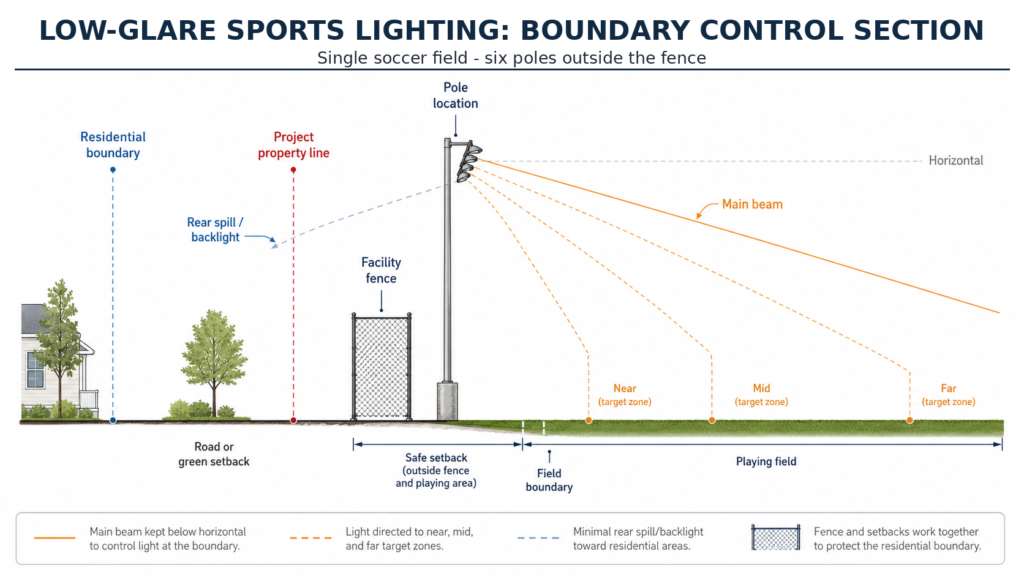
Effective boundary control separates the residential boundary, project property line, facility fence, pole location and field boundary while directing the main beam into the playing field.
7. Check Cameras, Vertical Illuminance and Critical Sightlines
Professional and broadcast projects require more than horizontal illuminance. Cameras need adequate vertical illumination, balanced contrast and suitable temporal light performance.
Glare control should therefore be checked from the main camera directions as well as from player and spectator positions. A design that looks comfortable from the sideline may still cause flare toward a camera or visual discomfort from a specific observer angle.
White competition lighting should remain predictable across all approved operating modes. If RGBW or event effects are included, their control and failure behavior should be separated from the essential white-light system.
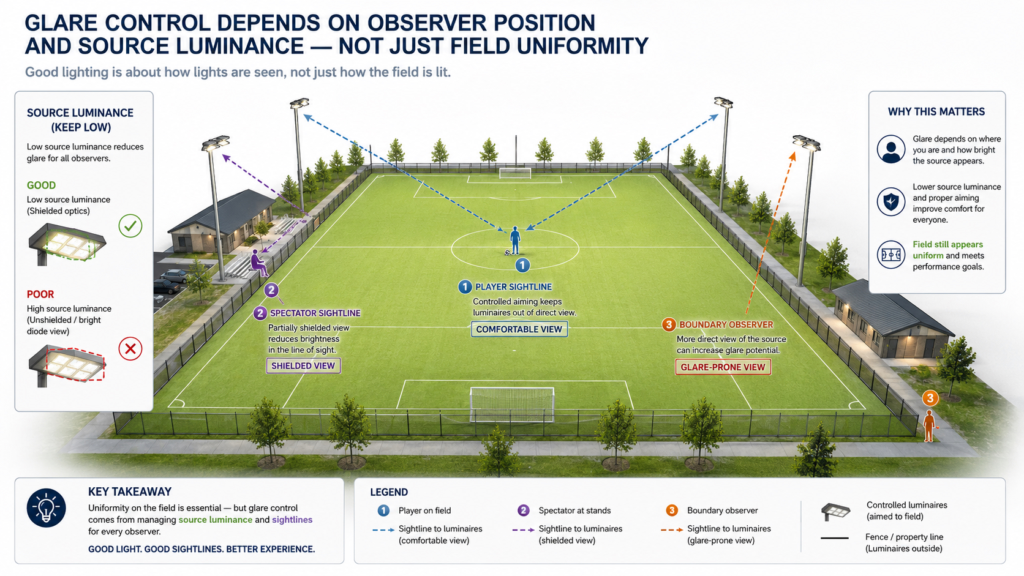
Glare depends on observer position and visible source luminance, not only on average field uniformity.
8. Use Operating Modes to Avoid Unnecessary Brightness
Facilities rarely need full competition output for every activity. A practical control plan can include maintenance, training, competition, post-event and emergency/manual modes.
Training mode can reduce output while maintaining the uniformity required for practice. Post-event mode can lower the field level while retaining safe circulation for people leaving the site.
The exact dimming levels should be based on the approved project design. Generic energy-saving percentages should not be published without the actual operating schedule and field-use assumptions.
9. Verify the Installation at Night
A computer model predicts performance; it does not prove that the installed project matches the approved design. Differences can be introduced by changed pole positions, mounting tolerances, incorrect optics, driver settings or aiming errors.
Night commissioning should confirm the installed product and optic, pole and luminaire IDs, initial aiming, operating modes, communication-loss behavior, field measurements and boundary observations.
The final as-built package should record luminaire model, optic, power setting, pole ID, tilt, azimuth, target zone, control address, measurement results and photos.
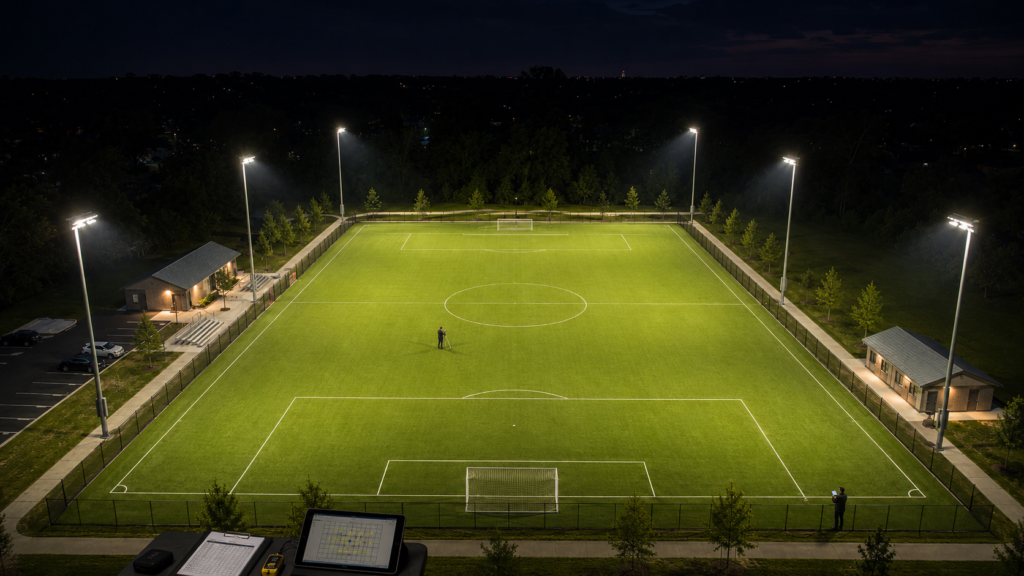
Low-glare sports lighting should be verified after installation through field observation, aiming review, operating-mode checks and boundary assessment.
10. A Three-Level Glare-Control Framework
Product level: controlled optics, suitable source luminance, shielding options, stable driver output and verified photometric files.
Design level: pole geometry, beam allocation, aiming, observer positions, vertical requirements, boundary calculations and structural feasibility.
Operation level: training and competition modes, curfew, manual override, failure states, commissioning and post-installation verification.
A project is only genuinely low glare when all three levels work together.
11. Where ZC Lighting Fits
ZC Lighting can support the luminaire and engineering-data layer of a sports-lighting project. This includes product configuration, photometric files, optical options, shielding accessories, driver and control interface information, and practical project documentation.
The final glare and boundary result remains a project-level outcome involving the lighting designer, structural and electrical teams, contractor, control integrator and owner.
A credible project statement is: ZC Lighting provides reliable luminaires, controlled optical options and engineering-ready data to support project-specific glare control and verified delivery.
Project Checklist
- Define the sport, competition level and operating modes.
- Identify player, spectator, camera, road and residential observer positions.
- Confirm pole coordinates, height, setback and structural constraints.
- Select near-, mid- and far-zone optics.
- Calculate horizontal and relevant vertical illuminance.
- Review backlight, spill light, direct uplight and reflected light.
- Check shields and visors in the revised calculation.
- Confirm driver settings and control modes.
- Commission the field at night.
- Record final aiming, measurements and as-built information.
Conclusion
Glare control is not achieved by one accessory, one product label or one photometric number. It is created through the relationship between source luminance, optics, pole geometry, aiming, observer position, operating mode and verification.
The best sports-lighting design does not trade uniformity for comfort. It directs the required light to the correct target areas, limits unnecessary intensity toward observers and confirms the result after installation.
For sports projects near communities, low-glare performance should be treated as a project outcome, not a generic product claim.
| Planning a Low-Glare Sports Lighting Project? Share field dimensions, pole layout, mounting height, nearby boundaries, target lighting level and operating modes. ZC Lighting can help organize the luminaire and engineering inputs required for an initial review. |